I've owned the Bracketron PHV-202-BL, vent-mounted smartphone holder for a couple years now. Cheap AND practical. It's worked like a charm all this time, but today one of the two spring clips that attaches to the vent louver broke. Dang.
I was about to buy a whole new unit... but the bracketron website gives out FREE REPLACEMENTS!! Seriously, is that COOL or what???
Here's the link for the replacement springs:
http://www.bracketron.com/spring-clip-replacement
If you'd like to order one of these puppies, here's the amazon link:
Bracketron PHV-202-BL
(The PHV-200-BL is identical except for packaging... they share the same replacement springs)
Geek out!
Monday, October 29, 2012
Saturday, October 20, 2012
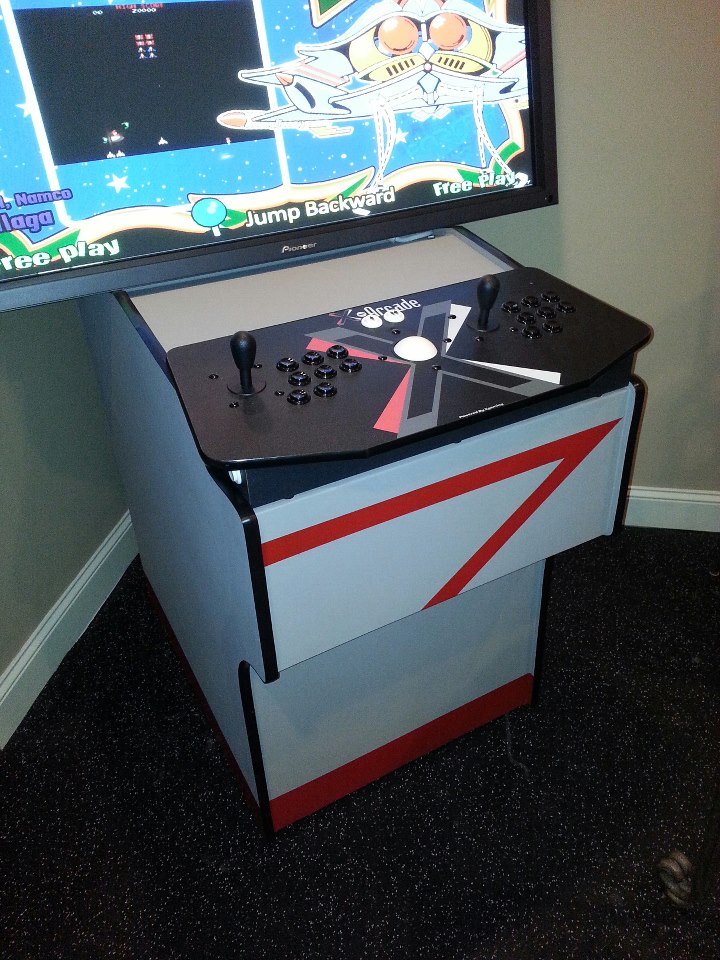
Arcade update
I've been steadily working on the arcade when I get a couple free minutes here and there on the weekends, in between "honey-do" chores, church, community group bible studies, and just plain relaxing.
A week ago I applied the T-Molding all around, and a couple places needed some glue to keep the T-Molding down in the curves, since I had to redo a few grooves where it wasn't perfectly centered. So, when you re-groove it, it's wider than it should be and the T-Molding has to be glued into place. Gorilla wood glue and some weights and tiny temporary staples solved that. Next time, it would be best to use a router table for a PERFECT centered groove, which is more difficult by hand, I must say.
It's about ready to transfer to the basement game room, and I can finish it up down there. The custom marquee, marquee brackets are on order, and hope to have them delivered soon. The side art is drawn up and the "DANGER JET BLAST" lettering has to be applied to the front (aka F-14 intake graphic).
The colors are from an F-14 at my squadron, VF-101 Grim Reapers, that was custom-trimmed in red paint on the tail. The grey color is a perfect match to an F-14. Of course, a good Tomcat is a dirty plane, with various panels of various colors...so to be a good match, I may have to "antique" the finish a bit.
Today, I installed the electrical box on the back to plug in the power-strip and computer, which will have a power-on relay to power up the sound amp, marquee lights when the PC is turned on. I think I'll have an arcade switch on the side to wire-in the momentary power button for the motherboard...but have yet to work out where to put the power button... maybe on the front panel for easy access.
Also notice the magnetically attached access panel on top, to be able to reach into the computer area, if need be, without having to pull the unit away from the wall.


Tuesday, October 2, 2012


Wednesday, September 12, 2012
Virtual Pinball Machine
I'm nearly complete with my Virtual Arcade cabinet... it's all painted and needs some final touches like T-molding and the custom marquee.
But, when I'm not home, I am now beginning to plan my virtual pinball machine, with a LCD flat panel displaying 3D pinball games, and the backlight LCD displaying the matching score boards and DMD graphics.
There are some kits available at Virtuapin.net from the basic wood boxes, to the full kit, all ready to bolt-together-n-go.
The front end is Hyperpin
Lots of forums and downloadable tables at VPForums and PinSimDB
Cabinet Design video (example) here on YouTube, with instructions on the VPforums HERE
YouTube videos of hundreds of virtual pinball tables... some pretty nice, with construction details.
Parts:
47" LCD (Vizio 47" $650) 1080p 120Hz PC and HDMI input [ SUPER Wide-body Pinball! ]
32" LCD (Vizio 32" for $400)
19" LCD (Samsung 19" for $190)
Note: all TV's with RGB hookups
Box kit
Button kit $55
Trim kit with leg protectors $450
Accelerometer & plunger $140
Note:
Widebody glass dimensions: 43" x 23-3/4" $50
PC: Have already with video cards and software
Monday, September 10, 2012
Honda Insight (Gen 1) Maintenance and Repair
I sold my super dependable 2002 Lexus GS400 (one trip to the shop in 10 years), for a very miserly 2002 "Sebring Silver" Honda Insight. Same price... one you pay for luxury and the other you pay for fuel savings.
Anyway, the Honda Insight had a major service at the Honda dealer (on their dime) when I bought it.
1) new IMA hybrid battery pack ($3000 value)
2) new tires
3) ? new brakes... need to check on this via Honda service database
4) ? replace coolant... need to check on this via Honda service database
My Insight now has 140,000 miles... I've added 50K in just 12 months of commuting every weekend between Pensacola and Atlanta.
MAINTENANCE and REPAIR:
Link to Honda Insight Maintenace Interval list and Excel Spreadsheet: HERE
Just this week the idler pulley that tensions the serpentine belt started to whine, so a trip to the Autozone got me a new idler pulley wheel for $57. Took about an hour to change it out. Now, it's quiet as a baby again.
Link to idler pulley repair is on insightcentral.net forum with part #'s, etc.
I added last weekend an aftermarket Cruise Control. The total install time was about 7 hours. A second time would probably take 3, now that I figured it all out, and realize that most of the little parts that came with the generic cruise control kit are not used. Here's the DIY, step-by-step on the cruise control install at the InsightCentral.net website.
Some added thoughts on maintenance in the near future:
New Serpentine belt, at Autozone about $18
Coolant change, YouTube DIY video HERE
Make sure and use pre-mixed Silicate Free over-the-counter "Green", or Honda "Blue" coolant Type 2, P/N L999-9001. Uses about 2.5L for a normal "drain-n-fill" procedure.
Manual tranny fluid change, Genuine Honda MTF, about 1.6 quarts of oil. Link to InsightCentral thread
EGR valve replacement/cleaning and EGR plate clean-out: Links to EGR valve repair and rebuilt EGR valves here. EGR Plate cleaning DIY HERE
Another nice thread of pics cleaning EGR valve: HERE
EGR plate uses Honda Liquid Gasket
Spark plug replacement (they are "indexed" for each cylinder, so you must buy them from Honda)
Honda DOT 3 brake fluid replacement, recommended every two or three years. DOT 3 used in both brake and fluid clutch system, and about three 12oz bottles to flush both systems.
Brake bleeding using autobleeder (pics): HERE
Clutch bleeding procedure HERE
Valve lash adjustment, cold, .008" exhaust, and .007 intake". DIY LINKhttp://www.insightcentral.net/forums/honda-insight-forum-1st-gen-discussion/15976-valve-adjustment-proceedure-write-up-pics.html Can re-use gasket if you're careful not to damage it.
The valve clearance is: 0.007"-0.009" intake (closest to front of engine)
0.008"-0.010" exhaust (closest to firewall)
Monday, August 20, 2012
Honda Insight Wet Seatbelt Repair
The 2000-2006 Honda Insight is a great car, but sometimes a bit of rainwater can leak through a side molding clip that has aged and cracked. I have a 2002 Insight which gets a wet driver-side seatbelt after a typical Florida afternoon driving thunderstorm.
I ordered the new clips and gave the repair a go, with help from www.insightcentral.com Insight geeks...
 Above: broken clips after removing upper molding... inevitable. Seven of these needed new. (Rear-ward one is larger and different)
 Bought a spare large retaining clip, but as you can see, it remained intact upon removal. It needed some silicone sealant all around the base, as this one is the BIG leaker.
 Some factory goop....(I removed it, and re-siliconed ALL the holes right before replacing the trim with the new clips installed on it.
 Trim with all the clips removed. A couple of the straight "fins" (which insert into the metal retaining clips) broke... but I still re-installed, and it's fine.
 New clips installed onto the old trim.
 Close-up of new clip and new rubber washer installed on the trim.
 The pesky rear retaining clip that leaks... so gooped it up well with clear window silicone sealant. It's dry as a bone now!
 Forward clip (which usually does NOT break upon trim removal... so you probably won't need to order it. I did just to be sure.) Also shown is the retaining bolt... the only thing holding your trim on your car when all the clips are broken!!! Remove the bolt, repair the trim, and re-install the bolt as your last step. The forward clip shown is the beginning point of reinstalling the trim... it fits into a groove on the front of the trim piece.
 Trim reinstalled with a great gap line.
 Closeup of the re-installed fender/trim bolt.
 Forward view of the trim re-installed and the trim gasket firmly in place against the windshield.
I used my local dealer, who matched internet pricing (with the shipping/handling):
Honda part numbers for the clips:
91503-S3Y-003 - {img 33} you need 7 per side
91511-S3Y-003 - {img} 38 you need 1 per side (rectangular clip at the rear... attached to the trim)
These two usually don't break upon removing the trim:
91504-S3Y-003 - {img 34} you need one if you break it (lower windshield side)
91505-S3Y-003 - {img 35} you need 1 (this is the large square retaining clip attached to the car body which you need to seal with silicon if you have the seatbelt leak)
Note: "{img 33}" (et cetera) is the image of the small part in the Honda Parts Manual.
Good luck!
I ordered the new clips and gave the repair a go, with help from www.insightcentral.com Insight geeks...


I used my local dealer, who matched internet pricing (with the shipping/handling):
Honda part numbers for the clips:
91503-S3Y-003 - {img 33} you need 7 per side
91511-S3Y-003 - {img} 38 you need 1 per side (rectangular clip at the rear... attached to the trim)
These two usually don't break upon removing the trim:
91504-S3Y-003 - {img 34} you need one if you break it (lower windshield side)
91505-S3Y-003 - {img 35} you need 1 (this is the large square retaining clip attached to the car body which you need to seal with silicon if you have the seatbelt leak)
Note: "{img 33}" (et cetera) is the image of the small part in the Honda Parts Manual.
Good luck!
Thursday, August 9, 2012
What's the Difference Between DVD-R and DVD+R?
Diffen.com has a good chart and video explanation of the difference between the two. DVD+R gives the greatest compatibility with off-the-shelf DVD players, if you happen to want to burn a movie on your PC to watch on your TV later. A snippet from their website (full credit to Diffen):
Origin and industry support
The DVD-R standard was developed by Pioneer. It is used primarily by Apple and Pioneer. In addition, this format is supported by the DVD Forum, but is in no way an industry standard. The DVD+R format is supported by Philips, Dell, Sony, HP, and Microsoft.
EDITDifferences in Features
DVD-R/RW discs can only be written to in one layer on the disc's surface. On the other hand, DVD+R/RW discs can be written to in multiple layers, giving them slightly better and more disc storage than the DVD-R format.
EDITAdvantages of DVD+R
According to the claims of the DVD Alliance, using a DVD+R (or DVD+RW) recorder will provide the following advantages over a DVD-R recorder:
- Instantly eject without having to wait for finalized formatting.
- Ability to record one DVD disc partially on PC and partially on television.
- Background formatting: while the disc is being formatted, you can simultaneously record on already-formatted portions of the same disc.
- Enhanced ability to edit filenames, movie and song titles, and playlists.
- 100% compatibility with all other DVD players, while still enjoying these extra recording features.
| Multiple | Single |
| 4 706 074 624 bytes (4488 MB) | 4 706 074 624 bytes (4488 MB) |
| DVD Plus R | DVD Dash R |
| DVD+RW alliance (Sony, Yamaha, Philips, Dell, Microsoft etc.) | DVD Forum (Apple, Pioneer , Mitsubishi, Hitachi, Time Warner etc.) |
| Yes, supported. This technology is code named Mt. Rainier and is a hardware feature. | No, not supported. |
Sunday, July 22, 2012
Converting from Halogen to LED landscape lighting
I was doing some calculations and discovered that my two banks of halogen landscape lighting was over 300 watts. They average about 7 hours an evening (6 hours in the Summer and 8 hours in the Winter), so at 12c a kilowatt hour, that is over $90 a year in electricity just to power my outdoor lighting.
I have a total of fifteen 20watt halogen bulbs, and prices are just now getting to the point that LED is becoming viable. Lowe's has replacement LED MR16 bulbs for about $20 and that is just still too high for a decent payback interval.
Doing some research on Amazon, I found some 3 watt MR16 LED lighting for $3.55 each. Not bad, since the halogen bulbs retail for over $7 at Lowe's. A quick calculation showed a payback time in under four months, which not only includes savings on electricity, but reduced replacement costs from halogens that don't last as long as LED. The halogens seem to last a couple years or more, but the LEDs may last for 10+ (only time will tell on that one.)
You can do your own ROI (return on investment) calculations at this website getgreen.net.
So I ordered up the replacements, and installed them today. Swapping them out only takes about sixty seconds each to remove the glass cover, remove the halogen, slip in the LED into the bayonet fitting, and replace the glass covers. Couldn't be easier, and the savings will be $180 a year in total savings on electricity and replacement costs. Or, as the federal government would say to drive home the point: "$1800 in savings over the next ten years."

The LED is on the left, and the old halogen bulb on the right.


Drilling holes in granite... easy!
I needed a 2" hole in the back of our kitchen office area where the computer lives... Problem is, it's a jumble of wires, power cords, USB cables, power-strips, LAN cables, DSL modem and Wi-fi router. A real-eye sore.
So the wife wants me to fix it. Solution? Get the gear below the desk-top, and run the few cords through a 2" hole to below. Second problem: How to get the hole drilled. Hire a Pro? $100. On second thought, maybe run through the wall? The backsplash is slate tiles. So back to drilling a hole.
I go to YouTube and lots of videos on how to do it. Just buy the right diamond-encrusted hole saw and use lots of water while going REALLY slow.
I bought this 2" (50mm) hole saw off of Amazon (CLICK HERE) for just a few dollars, and it came in a week or so, wrapped in a nice re-usable ziploc sealed bag to protect the diamond dust cutting edge.
I read that one can make a small encircling rim to hold water around the targeted hole using plumber's putty... worked like a charm.
The trick is to mark the area with a grease pencil or small dab of white paint to show you where to start. You begin by tipping the bit and starting just a small edge to get a bite, and as it starts to dig in, you slowly tip the hole drill to vertical to start the downward plunge. The tip-start ensures the bit doesn't walk around, causing all kinds of mayhem and unwanted gouges and scratches.
It took about 20 minutes to slowly go through the 1" granite, with frequent stopping to cool my cordless drill. The bit actually stayed cool to the touch with the little pond of water it was dipped in to drill.
 Since the bit is only about an inch deep, it didn't
 make it through before bottoming out. No worries, as I knew I was maybe 1 or 2mm from completely the hole. I mopped up the residual water and just gave the center of the hole a moderate tap with a large hammer and just knocked the core out the bottom. Cracked out pretty cleanly with maybe just a small lip...but that's on the bottom of the desk and won't be seen.
The finished product is fantastic, and after a quick clean up of the granite slurry and overspray, I was finished.

The shelf below the desk was made from 3/4" birch plywood, and stained, and installed using countersunk drywall screws (short). The shelf is 10" deep and 24" wide, and dropped 8" from the bottom of the sliding desk drawer.
Super easy, after all, and not out of the realm of any DIY'er. Good luck!
Matt

So the wife wants me to fix it. Solution? Get the gear below the desk-top, and run the few cords through a 2" hole to below. Second problem: How to get the hole drilled. Hire a Pro? $100. On second thought, maybe run through the wall? The backsplash is slate tiles. So back to drilling a hole.
I go to YouTube and lots of videos on how to do it. Just buy the right diamond-encrusted hole saw and use lots of water while going REALLY slow.
I bought this 2" (50mm) hole saw off of Amazon (CLICK HERE) for just a few dollars, and it came in a week or so, wrapped in a nice re-usable ziploc sealed bag to protect the diamond dust cutting edge.
I read that one can make a small encircling rim to hold water around the targeted hole using plumber's putty... worked like a charm.
The trick is to mark the area with a grease pencil or small dab of white paint to show you where to start. You begin by tipping the bit and starting just a small edge to get a bite, and as it starts to dig in, you slowly tip the hole drill to vertical to start the downward plunge. The tip-start ensures the bit doesn't walk around, causing all kinds of mayhem and unwanted gouges and scratches.
It took about 20 minutes to slowly go through the 1" granite, with frequent stopping to cool my cordless drill. The bit actually stayed cool to the touch with the little pond of water it was dipped in to drill.

The finished product is fantastic, and after a quick clean up of the granite slurry and overspray, I was finished.

The shelf below the desk was made from 3/4" birch plywood, and stained, and installed using countersunk drywall screws (short). The shelf is 10" deep and 24" wide, and dropped 8" from the bottom of the sliding desk drawer.
Super easy, after all, and not out of the realm of any DIY'er. Good luck!
Matt

Sunday, July 1, 2012
GE Profile Artica refrigerator ice dispenser freezes
The problem is the flapper door does not close, allowing moist air in and slowly freezes shut. Needs a new solenoid:
http://www.applianceblog.com/mainforums/ge-hotpoint/14017-fixed-ge-refigerator-ice-dispenser-wont-close.html

Will have to order one of these to see if this fix works!
EDIT: Oct 2012: I actually just disassmbled the entire ice chute from the inside of the freezer door. Just a couple screws and some plastic tab catches. There was a TON of ice under the area, and I was able to remove the ice block en masse , reassemble, and all is working great without a new mechanism. Sweet DIY!
Monday, June 18, 2012
Windows 8 Preview download

For the adventuresome geek, with a spare computer lying around to load a fully functioning Windows 8 preview:
http://windows.microsoft.com/en-US/windows-8/download
(or)
Direct to ISO Image download links (64-bit and 32-bit versions):
http://windows.microsoft.com/en-US/windows-8/iso
If you create ISO installation media, start your PC from the media, and then install Windows 8 Release Preview, you'll need to enter this product key: TK8TP-9JN6P-7X7WW-RFFTV-B7QPF
Windows 8 FAQ:
http://windows.microsoft.com/en-US/windows-8/faq
Tuesday, May 29, 2012
Power control and savings, automatic shut-off controls....
One of the things we all need to try and do is save some energy... What if you could turn off your lamp, printer, external hard drive, etc, coordinated with shutting off your computer (or TV, or whatever).
New powerstrips and outlets are available that 'sense' you have switched off one piece of gear, and through the smart-strip or smart-outlet, automatically turn off everything else plugged into it. It has some neat implications. One of the smart-strips even has extra "always on" outlets, too, in case there is something you don't want to turn off automatically (i.e. cable modem, router, or DVR).
Smart-strip on Amazon
$34 and has lots of switched and always on outlets, with good surge protection. Probably the best overall solution with the most possibilities for the home consumer with lots of equipment to control in one place.
Power Minder outlet
$21, cheaper, with USB control, and one switched outlet (use your own cheap powerstrip plugged into the one outlet). Surge control, too.
NiceMite PowerMiteDD, definitely for the DIY'er, and a circuit board for putting in a project box, etc. Simple, cheap ($14) and good reviews on the arcade forums.
Sunday, May 27, 2012
Arcade build... first weekend, and finished pics.
First real weekend of construction of the arcade, which is powered by a PC and a 50" plasma monitor, with Hyperspin software front-end, and a couple thousand video game and virtual pinball ROMs. I've been working on the plans and software for over six months, and its great to finally get going on the arcade. I've had the Tank-stick unit for about two years, in anticipation of this... I ordered it while still on Okinawa back in 2010.
I got three sheets of 4'x8'x 3/4" birch plywood delivered by Lowe's last weekend, and proceeded to transcribing my custom plans to the wood. This weekend, I got out the jigsaw, circular saw, and belt sander and got to work getting it all cut out and trial-assembled.


Next week, I'll cut out the speaker holes and ventilation holes at the top of the back panel. Will be ordering a 1/16" router bit for my router, and getting 30' of black T-molding. I will begin painting on the primer after all is assembled, glued, screwed and sanded. No screws show, as it's all internal connections, except for the back access panel.
I also will be designing the marquee and front, side decals. I'm going with a custom "Tomcat Arcade" theme, featuring, or course, the F-14 Tomcat. It will be a tribute to the Navy Squadrons who flew the famous dogfighter, and a fun reminder of my own time in the backseat for four years as part of VF-101, "The Grim Reapers" from '97 to '01. And yes, it will have both the sims of the arcade game and pinball games which have featured the Tomcat through the years.
More next week!
Thread at BYOAC forum:
Tomcat Arcade Forum Post
Design element ideas (added 28 May 2012):


Update: Jan 2013.
Well the whole setup is assembled, lighting in place, and marquee printed (google "EMKAY Marquee") and installed.
The PC is working great, and the X-Arcade tankstick and Hyperspin controls are all customized (along with the in-game key controls for MAME and Future Pinball).
I bought a small power amp to drive the 4" car speakers mounted below the marquee, and have plenty of power and the "just right" arcade sound.
The 50" plasma is a perfect look... just enough pixelation up close (1280x768) to give it that old-school screen look without having to artificially add scan lines (an option in Hyperspin)
Here's pics of the final product:


Friday, May 11, 2012
iPad wall mounting ideas...
At the top of the heap, a DIY wall mount video HERE on how to install the wall mount from ipadwallbracket.com . It sells for $100 and can come with home button exposed or hidden, depending on your application.
The Wallee system... cheap and elegant, and quickly removable. Downside is recharge cable would be exposed.
Premier Mount: more durable? More security? Needs more pics and tutorials on how this works.
The PadTab looks inexpensive and easy to use, with a minimalist wall hook-device. Did I say strong, too?
The iPadFrame looks more like a traditional picture frame, but also has power-dock integrated, as well as the function button. Could be just what I need... wish it was about half that price, though.
The Ledge is a sleek single CNC-milled aluminum block...still awaiting funding. Could also be carved from a nice piece of cherry or mahogany by a hobbyist, at home.
The Vidabox iPad Wall Mount is a flush mount unit... looks fantastic.
The eShop page lists these for about $99. Install instructions are on site, but the included "Charging Solution" needs more details and explanations. Another over-priced minimalist aluminum wall-bracket. $70, Seriously? Oh yeah, it's at the Apple store...
The Wallport... more for temporarly/semi-permanent holding, not very classy in the looks department (or WAF) Kiosk mounts for public access...and preventing use of the home button. And when I say "kiosk", I mean "ka-ching$$$"
LXB Wallpad, interesting angle-up approach for viewing while standing. Not a bad look...but something other than stark-white might be nice. Would work well for a billiard room jukebox or streaming music selector. Nano-second later edit: no longer available. Too bad, looked inexpensive and easy to mount. Might be something that can be one-off reproduced in wood and painted to match the wall.
Dockalot wall mount solution... $200. My used iPad was only $160! ;)
Wednesday, April 25, 2012
Future Pinball Tips and Tricks
I'm running Future Pinball in a Win7 64-bit OS.
Initially, tables had trouble loading, and then they wouldn't start right (key "5" for a coin and "1" for start).
The VPForums got me headed in the right direction:
1) Right-click on the program (or shortcut, however you start it, or both)
2) Select Compatibility tab, and select Winxp SP3, and "run as administrator"
3) In Future Pinball editor, select "Preferences"->"Editor Options" and de-select "load image into table editor"
4) Under Video preferences, enable "use texture compression" and enable "Set threading to Single Processor", and check "Vertical Sync" I can run these max settings on my NVIDIA 8800GTS at 72Hz.
Make sure and disable any antivirus (or at least for the hard-drive directory with Future Pinball, which is do-able with Avast antivirus under the settings). This will ensure tables load properly. Try to exit out of FP completely after each table, to prevent memory leak errors and table load problems.

Monday, March 19, 2012
How to backup on ANYTHING, including Windows 7
Great article on the How-to-Geek website on backing up just about anything, on any platform, including Win7, Android, iPhone, Linux, home servers, etc.
Thursday, February 9, 2012
Wednesday, February 8, 2012
Using the Kindle Fire as a Home Automation Touchscreen
$199 Kindle Fire
modded for HomeSeer control of his entire house lighting, HVAC, music, etc.
Click HERE for the story at HomeToys.com
modded for HomeSeer control of his entire house lighting, HVAC, music, etc.
Click HERE for the story at HomeToys.com
Tuesday, February 7, 2012
Mapping Online Cloud Storage to a drive letter..
Gladinet setup procedure in full... use the free version to map virtual drives to the cloud.
Wednesday, January 25, 2012
Tuesday, January 24, 2012

Subscribe to:
Posts (Atom)